• Skip to primary navigation
  • Skip to main content
  • Skip to primary sidebar
  • Skip to footer

Among Brenda's Quilts & Bags

Patterns Designed by Brenda Miller

  • Browse Patterns
  • Shop Now
  • Visit ABQ Sewing Studio
    • Visit Our Strathroy Store
    • Sewing Classes at ABQ in Strathroy, Ontario
    • Class Calendar
    • Baby Lock Sewing Machines
    • Sewing Machine Service and Repairs
    • Quilting Machine Certification and Hourly Rental
  • Sewing and Quilting Activities
    • Free Resources for Newsletter Subscribers
    • All Activities
    • Sewing Classes, Workshops, Presentations
    • Show ‘n Tell: Your Finished Projects
    • Free Patterns
    • Sewing Tips
    • Guide to Sewing Machine Feet
    • How To Choose a Sewing Machine
  • About
  • Sew Wonderful Blog
  • Mystery Five-0
  • Contact Us
  • Wholesale Buyers: Start Here

Attach a Magnetic Fastener to Your Bag

Like this? Share it!

Learn how to attach magnetic fasteners to your bags. You might think of it as tricky but it’s a snap!

As a pattern designer I like to use all kinds of fasteners for my bags. In this tutorial I’ll be showing you how to apply magnetic snap fasteners to handbags like my Girlfriends Bag.

Girlfriends_Bag_open
Girlfriends Bag with ends open
Girlfriends_Bag
Girlfriends Bag with ends tucked in and snapped closed.

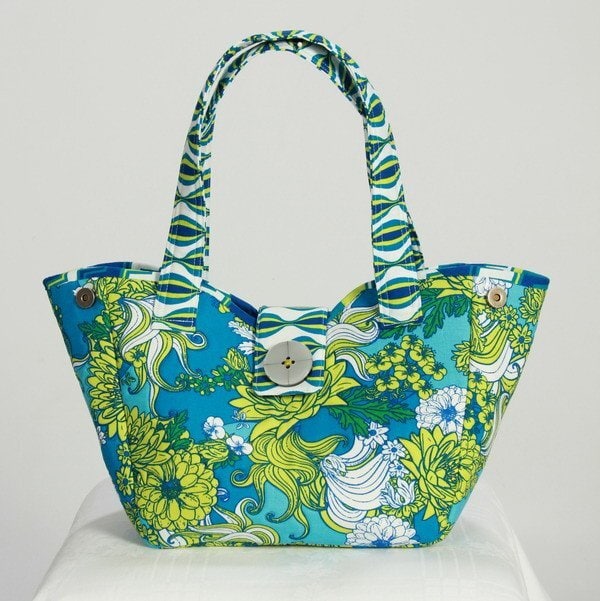
The Girlfriends Bag utilizes three sets of snap magnets. A set is found on each side of the bag so that it can expand, as in the photos above.

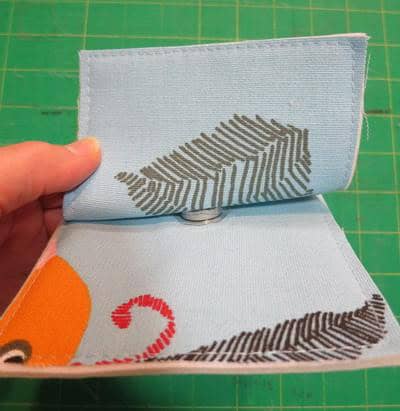
A set may also be used as a snap closure at the top of the bag on the flap.

If you’re making the Girlfriends Bag, you’ll need three 3/4 inch magnetic snaps. They are for sale at our online store as part of a hardware kit that’s specifically made for the Girlfriends Bag. This bag also requires foam stabilizer. Our store carries Bosal In-R-Form Sew-in Foam Stabilizer, but you could use Annie’s Soft and Stable or Inn Control when making the bag.

Other bag patterns that use snap closures are the Urban Computer Satchel, The Around the Block Bag, and the Essentials Tote. Hardware kits are also available at our online store for those bags.

Here’s how to apply the magnetic fastener

To practice, you’ll need a couple of 3/4 inch magnetic snaps, some scrap fabric, and a bit of clear vinyl. To get the feel for how this works when making a bag, I also suggest you use foam stabilizer.

Magnetic snaps have two halves and two washers per set. Note that there is a male half and a female half. If you are prudish call them insies and outsies!

Prepare the area where the snap will go

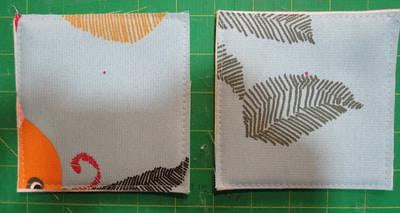
Cut two 4 1/2 inch squares of fabric and baste sew-in foam stabilizer to each piece, just like you’d do to make the Girlfriends Bag.
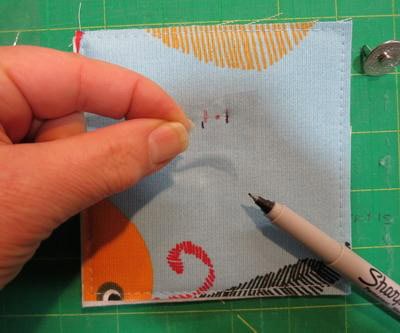
Mark the Fabric

Use a removable marker, and make a mark indicating the placement point on both squares.

4
Here in this example the placement point is indicated by a tiny red dot (made by removable marker).

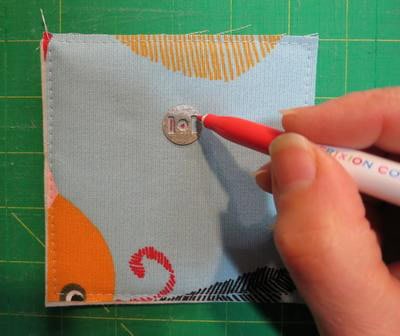
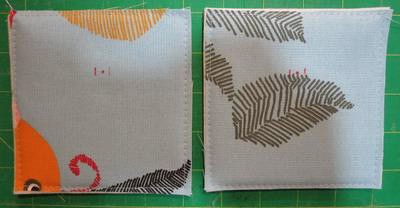
Center one of the washers over the mark on the fabric. Use a removable marker mark in the long slots to either side of the center hole.

Repeat for the other fabric piece.

5
Use the removable marker to add the indicator lines at the sides of the dot.

You’ll have a dot with two lines marked on each piece.
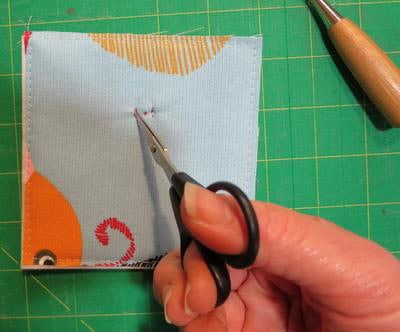
6

Puncture the Fabric

There are two ways to puncture the fabric. Using an awl does not cut the thread of the fabric. Snipping along the two lines with sharp scissors is easier, but it does cut the fabric. Myself, I usually cut the fabric.

Puncture fabric to apply magnetic snap.
Choice 1: Use an awl to puncture the fabric.
Puncture fabric to apply magnetic snap.
Choice 2: Cut the fabric with scissors.

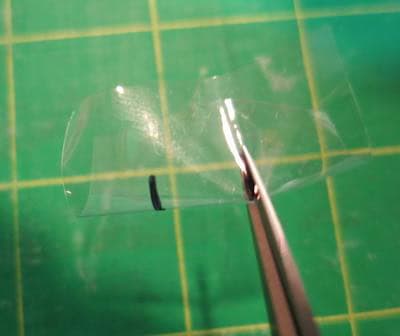
Use Vinyl to Reinforce and Protect the Fabric

To save wear and tear on the fabric from the edges of the magnet I like to cut small 1 inch squares of clear vinyl (like the stuff used to cover tablecloths).

Center them over the marked lines on the fabric and trace those lines on the vinyl using a fine-point Sharpie marker.

Reinforce the fabric with vinyl.
If you look closely you’ll see the clear vinyl placed over the markings.

Next I fold the vinyl in half and snip along the lines using my sharp scissors.

Snip the clear vinyl.
Vinyl is snipped with sharp scissors.

The vinyl gets placed over the marked area…

Place the vinly over the fabric
Vinyl is placed over the marked area

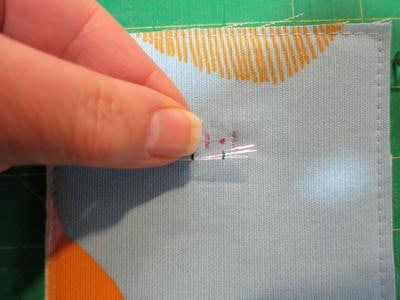
Attach the Magnetic Snap

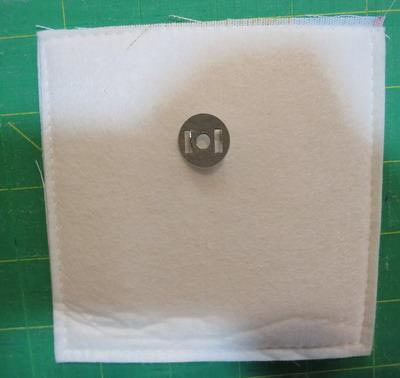
Push the snap through the holes to the opposite side. In this case we are using an outsie.

Push the snap through the hole
The snap is pushed through the holes

Place the washer over the arms of the magnet back.

Apply the washer
The washer is placed over the arms of the magnet back.

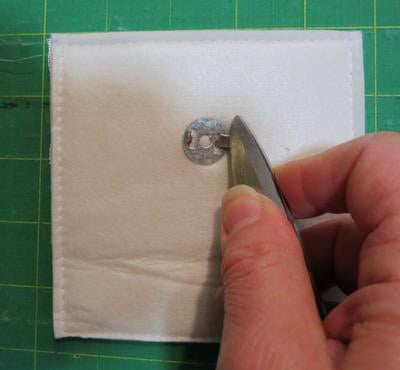
Then, bend back the arms using the ends of large scissors or a pair of pliers.

The arms are bent back

Finishing Touches

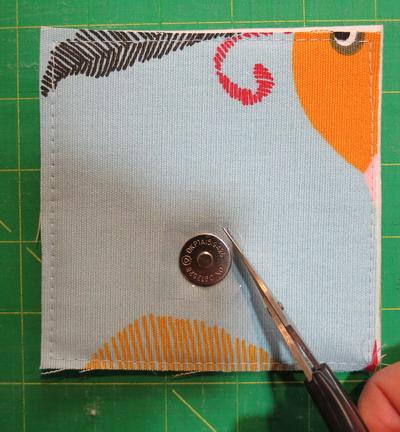
Trim the vinyl away from the edges of the magnet so just a little bit remains around it to protect the fabric from future wear and tear.

Trim excess vinyl
Trim excess vinyl with scissors

Apply the Other Half

Repeat this procedure for the other fabric piece using an insie – that’s logical though because that’s your remaining half of the snap magnet set!

Two sides of the snap, open
Either side of the snap, open.

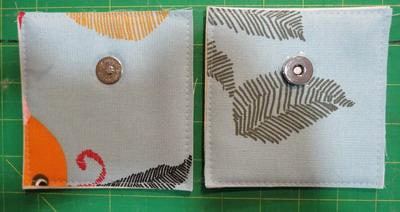
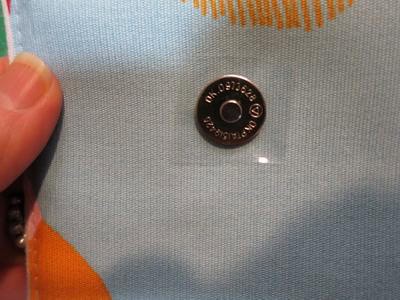
And presto – you have completed a successful application!

Working magnetic snap


Like this? Share it!

Filed Under: Sewing Tips Tagged With: Tutorials

Previous Post: « Fabric Pressing Secrets for Handbag Sewing
Next Post: Make a padded shoulder strap for your handbag »

Reader Interactions

Comments

  1. Donna Lee Simpson says

    June 30, 2022 at 1:23 pm

    Because the magnetic snap is SO STRONG – I’m concerned that it will be difficult to separate when applied to the crocheted handbag I’m making. Does the fabric provide a certain ‘barrier’ that allows the magnetic action to separate easily? Please relieve my anxiety about mounting a magnetic snap to my handbag – that it will open somewhat with ease. Thanks.

    Reply
    • Brenda Miller says

      June 30, 2022 at 3:10 pm

      A crochet handbag is a totally different animal. You might be better off crocheting a loop and sewing a button on to work with crochet. Hope this helps.

      Reply
  2. kellie hillman says

    August 6, 2022 at 8:24 pm

    do you need to put the vinyl on if you are doing a faux leather bag or real leather bag?

    Reply
    • Brenda Miller says

      August 7, 2022 at 9:24 am

      No you shouldn’t need it Kellie, so long as the magnet is smooth on the back part that rubs against your faux leather.

      Reply
  3. Aster says

    February 26, 2026 at 8:03 am

    I am making a bag, but the backs of the clasps can be seen. How could I cover this?

    Reply
    • Brenda Miller says

      February 26, 2026 at 8:18 am

      The magnet must be applied before the lining fabric goes on. It’s applied to the outside of your bag and through any interfacing or stabilizer. Then the lining is attached to the inside of the bag so that the part that you want to hide is between these layers.

      Reply

Leave a Reply to Aster Cancel reply

Your email address will not be published. Required fields are marked *

This site uses Akismet to reduce spam. Learn how your comment data is processed.

Primary Sidebar

Newsletter Signup

Sewing & Quilting Activities

  • Show ‘n Tell
  • Quilt Guilds
  • Round Robin Quilt Project For Guilds or Groups
  • Why do we care about quilting and sewing?

Trips to China and Canadian Quilts in Taiwan

  • Taiwan Art Quilt Society Show
  • Travel to China

Footer

ABQ Store

Shop Online

Make and Share

  • Show ‘n Tell
  • Quilt Guilds
  • Round Robin Quilt Project For Guilds or Groups
  • Why do we care about quilting and sewing?

Travels

  • Taiwan Art Quilt Society Show
  • Travel to China

Tutorials, Classes & More

  • Class Calendar
  • About Classes at ABQ Sewing Studio
  • Sewing Tips
  • Online Tutorials and Classes at Make Bags With Brenda
  • About Live Classes, Workshops, and Presentations

Pattern Designs

  • Bag Patterns
  • Party | Picnic | Home Patterns
  • Quilt Patterns
  • ABQ Bag Zippers

ABQ Sewing Studio

Visit in person

  • Classes at ABQ Sewing Studio
  • Sewing Machine Service and Repairs
  • Authorized Retailer for Baby Lock Sewing Machines
  • Quilting Machine Certification and Hourly Rental

Wholesale Buyers

  • Wholesale Buyers Information

Sew Wonderful Blog

  • Pattern Musings
  • Places
  • Sew Wonderful
  • Reflections

Follow us

Using This Site

  • Contact Us
  • Privacy Policy
  • Terms

About Us

  • About Brenda Miller
  • About Among Brenda’s Quilts & Bags
  • ABQ Sewing Studio

Copyright © 2026 Among Brenda's Quilts

We use cookies to ensure that we give you the best experience on our website. If you continue to use this site we will assume that you are happy with it.