Editor’s note: This is the first in a series of posts that will make up a guide to sewing machine feet. Find them all here.
How to sew a perfect ¼” seam using a quilting foot
Here we’re discussing the ¼” foot commonly used for quilting. If your machine doesn’t have that foot available, though, don’t despair! I’ll give you some alternatives.
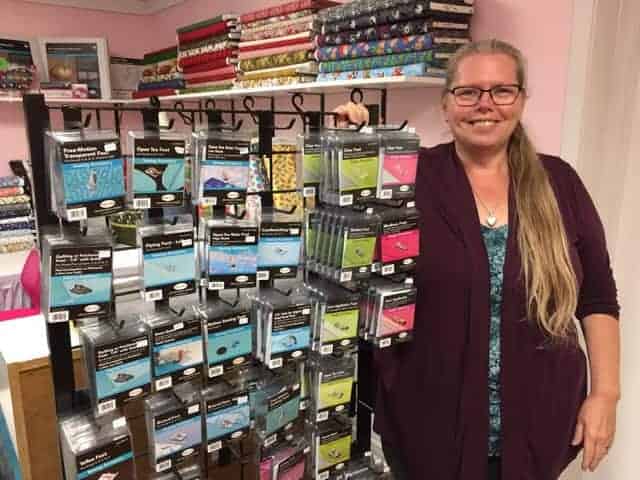
If you have a Baby Lock sewing machine you will find this foot available for purchase at ABQ Sewing Studio or online at the ABQ store. For other sewing machine brands, a simple search should give you what you need.
A little background
I have a passion for sewing machines…. I love them all. I like to know how they work and all the amazing things they can do. Part of that is natural curiosity, and part of it comes from working for 10 years in a place that had an on-site sewing machine repair technician.
Believe me when I say I have seen it all, from creepy crawly critters making a home inside the machines that came in for repair, to entire spools of thread wrapped around the handwheel. I have experienced the whole spectrum; from people who take care of their machines like they are their children (I pretty much fall into that category), to others who are proud of the fact they have had the machine for 30 years and never brought it in for service, cleaned it or changed the needle!
I have seen machines so packed with fluff that the feed dogs could no longer function. I have had to break the news to people that their much-loved machine is no longer fixable and they need to let it go and get a new machine. I feel joy when that same person gets a new machine and learns all the new and wonderful things it can do. Needless to say, I have given countless hours of lessons on new machines or older machines the owners have just forgotten how to use.
Why I started making a guide to sewing machine feet
I’m an addicted quilter who loves to teach and share what I have learned and one of the questions I get on a regular basis is What is this foot and what is it for? I get this question so often I thought it might be nice to have a reference to turn to.
Sew, if you are feeling de-feeted by all of the confusion and it seams like it is just easier to always just use the standard foot, let me help you figure out which is which and how to put your best foot forward.
Benefits of the right sewing machine feet
The right foot will make your sewing experience not only more enjoyable it will help with things like accuracy, fabric control and give you a beautiful stitch. The right foot can also make a specific task like putting in a zipper a whole lot easier. Some feet can open up a new world of sewing fun (like free-motion sewing) and some of the very cool decorative stitch feet can add that little bit of sparkle to a project.
Remember, the right tool for the job makes the job easier.
Use the piecing foot to sew perfect ¼” seams for your quilt
Most machine manufacturers have this type of foot available, but they may look a little different and have a slightly different configuration than the ones I have pictured here. However, they all function basically the same.
The ¼” piecing foot is made for quilting. After I had finished shooting a video for a class, during the playback I noticed how often I said “sew this seam with an accurate ¼” seam.” I made it sound a little scary and as elusive as bigfoot. It is not scary at all, especially if you have the correct feet.
WARNING: This is a narrow single hole foot which requires your needle to be in center needle position. I usually caution people to be aware of this foot and never forget you have it on because if you try to do a zig-zag stitch it will not be good for your needle or your machine. If you have the ability to do so on your machine, it is a good idea to turn your stitch width safety on, and that way your machine will not zig-zag even by mistake.
Toe
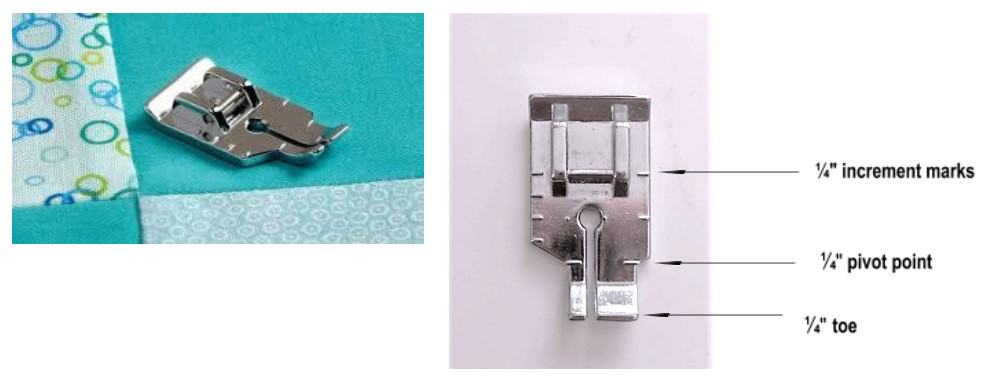
¼” toe is the part of the foot you line up with the edge of your fabric. When you are sewing you watch this area and line up the edge of your fabric right on the exact edge of the foot for ¼” seam or topstitching.
Pivot point
¼” pivot point is exactly ¼” from the needle so if you are sewing on a corner and need to pivot ¼” from the end, sew until the edge of your fabric is on this line, leave your needle in the down position, raise your presser foot and pivot, and you will be exactly ¼” from the end of your fabric.
Increment marks
¼” increment marks: This is the part of the toe to help you line up your work at ¼” increments. Let’s say for example you wanted to start stitching a seam ¼” away from the edge of your fabric like we do when we are setting up to make mitered borders or “Y” seams. This added mark on the foot allows you to do this without having to take the time and mark your fabric.
Bonus – 1/8″ marks on the other side
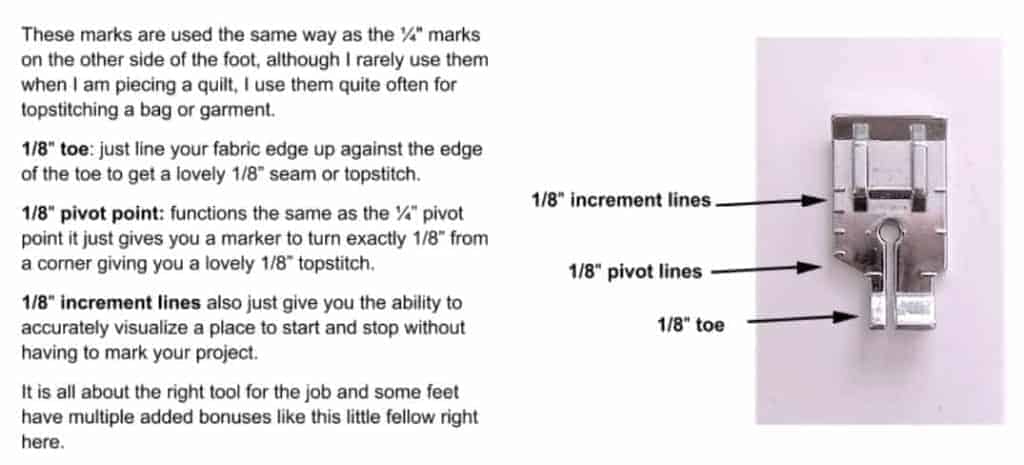
An added bonus to this foot that has nothing to do with the 1/4″ seam are the 1/8″ marks on the other side of the foot.
¼” Foot with a guide
WARNING: This foot also has a narrow single hole requiring your machine to be in center needle position therefore the same precautions apply to this foot about trying to zig zag….just don’t do it.
Guide bar
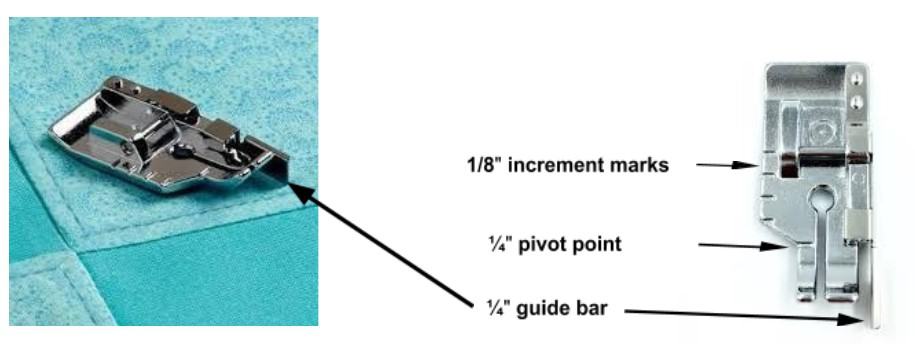
¼” Guide Bar: This built-in guide bar sticks out slightly longer than the foot base and slightly below the front of the foot. It is a little easier to see in the first picture. This guide allows you to sew an accurate ¼” seam or topstitch by giving you an edge to butt your fabric up against. You just gently guide your fabric against the bar. I do caution sewers not to be too aggressive and strongly push your fabric against the bar because if you push too hard you can move the guide bar which will give you too wide of a seam. If you are also using pins to hold your seam you will need to remove the pins before you get to the guide or they will get caught on the edge of the guide. I generally find this foot to be a disadvantage if I am sewing a seam on a sharp curve because of having to remove the pins.
This particular foot pictured here has a nice strong guide bar that keeps you on the straight and narrow but some of the feet I have seen and used do not and the guide bar is very easily moved. Check that out when you purchase your foot because if it has a wimpy guide bar that is movable you will probably not get a lot of satisfaction or accuracy from that foot.
Pivot point
¼” Pivot Point: The pivot point on this foot works the same as it does on the foot without the guide, as do the 1/8″ increment marks. I rarely, if ever, use this foot for anything other than accurate quarter inch seaming or topstitching although it has the 1/8″ toe, the same as the foot without the guide. I find the guide bar becomes a hindrance and gets in the way when I am trying to do a 1/8″ seam. Therefore, I find this is not the right tool for that particular job, but the job it was made to do it does very well.
Getting an accurate ¼” seam using your regular foot
With the popularity of quilting, most machine manufacturers have a ¼ inch foot available for their machines, but not all. If your machine doesn’t have a ¼ inch foot available, there are still a couple of things you can do to get an accurate ¼” seam using your regular foot.
If you have the ability to move your needle position in increments
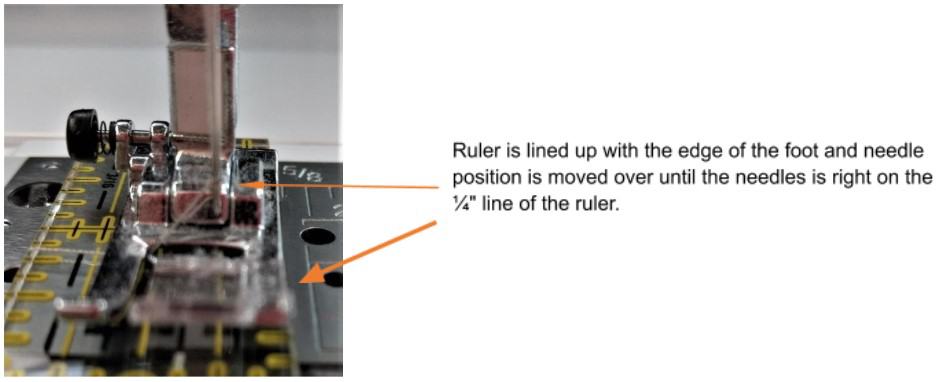
- Take a ruler under your presser foot and and line it up exactly with the edge of your regular presser foot
- Lower your presser foot onto the ruler.
- Move your needle position over until it is right on the ¼” mark on the ruler. Hand walk the needle down to make sure it is right on the ¼” line.
- Make a note of your settings so that you know in the future what the needle position is for that particular foot.
Now you just line your fabric up with the edge of your foot when you are sewing your seam.
If you cannot move your needle position in increments
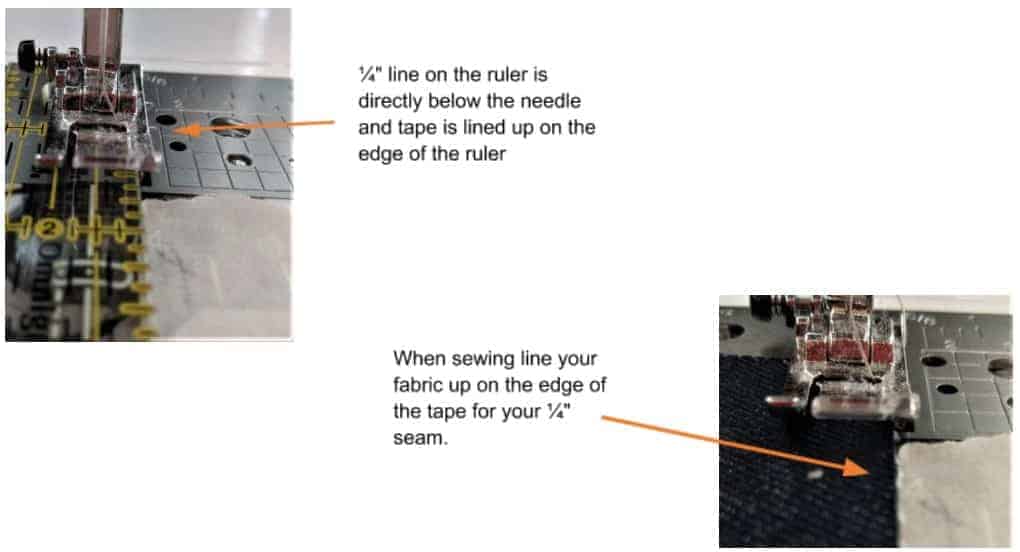
For this you will need some masking tape, the blue or green is nice because it is more visible than the regular natural coloured tape….do not use duct tape it is too sticky and will leave residue on your machine bed.
- Start out with the same ruler under your presser foot but for this you will line up the ¼” mark on the ruler with your needle.
- Lower your presser foot and hand walk the needle down to make sure it is exactly on the ¼” mark
- Take a length of masking tape and lay it down right on the edge of the ruler. Make sure the tape is not covering your feed dogs.
Another option: an external seam guide
Another option if you don’t want to put tape on your sewing machine bed is to get an external seam guide, meaning one that is not attached to the foot but attaches to the bed of the machine. This eliminates the step of having to measure your seam allowance with the ruler.

These types of guides will usually do multiple seam allowances. You just set it for the seam allowance you want and feed the edge of your fabric against the guide. The advantage of this type of guide is that you can use it for multiple seam allowances. The disadvantage to this guide is they are machine specific and not available for all machine models.
Purchase a Baby Lock 1/4″ Quilting Foot
ABQ online store carries the ¼” quilting feet and seam guide. Purchase it here.
We also carry Baby Lock sewing machines. See our sewing machine selection online or pop into ABQ Sewing Studio, 15 Centre St. W, Strathroy, Ontario.
Thanks for the tutorial on 1/4″ seam allowance. I found it very helpful. S
Wyn
I would like to know the best way to sew a scant 1/14″.
Sorry 1/4″
I have been sewing for 50+ years and I am always amazed at what you can learn when you have tutorials like this. I have now viewed/watched the first 2 tutorials and hope this series will continue. Thank you. Linda