Every so often I get a hankering to create a new bag pattern, and the first question is, of course, what kind of design do I want to do?
What about a backpack pattern?
Being hands free is important when trekking about in town, doing a little flea marketeering, or visiting the local farmer’s market. And although it does not feel like it this week here in Ontario, warmer weather will soon be upon us, and a cute backpack is going to come in handy when the sun begins to shine warmly once again.
Ideas had been percolating in my head for several months on the features I wanted for my own backpack pattern.
- It has to perform well by having the right kind of front pockets. They can’t be too big or too small, too baggy or too tight.
- All the pockets have to be secure.
- The bag has to have padded room inside for a tech device.
Crazy for backpacks: the design ideas phase
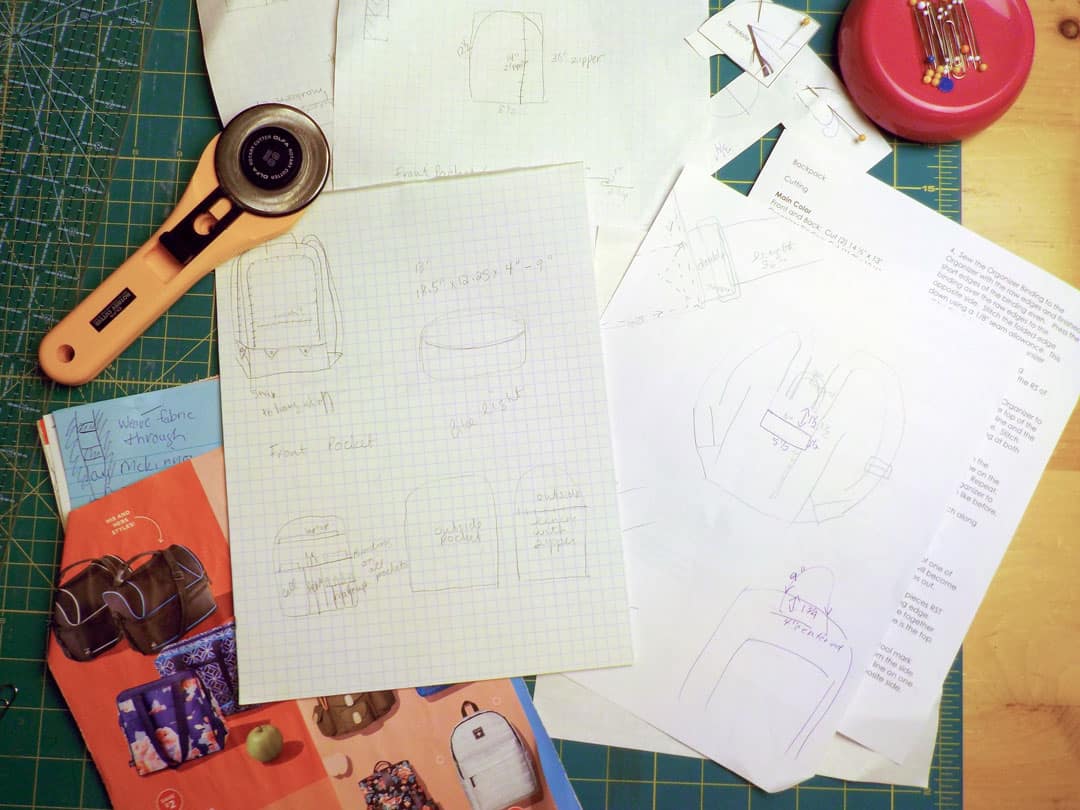
To get in a backpack frame of mind I immersed myself in all things ‘backpacky’. This involved clipping pictures, googling madly, drawing sketches and being super nosey when behind a good backpack in the Tim Horton’s coffee line. When my husband asked me one day ‘have you seen my backpack’ you can guess who had it in her studio!
I visually disassembled backpacks, window shopped backpacks and dreamed backpacks. All this before taking a single stitch!
- Who would be using this fantasy backpack? You, of course!
- And what might you be carrying – your phone, pen, lipstick, e-reader or iPad, perhaps a small computer, lunch, books and papers?
- And where would you be using it? Quilt shows like CreativFestival and Quilt Canada came immediately to mind. That’s where I see a lot of backpacks being carried by quilters and sewists while they shop.
Decisions about backpack pattern details
Size and Shape
Once I settled on the optimal size (13 ½”H x 12 ½”W x 3 ½”D) I had to decide on the overall shape. A triangular shape would have been fun but that would not work with storing tech devices that require a larger padded rectangular pocket. Girly-pretty is nice but it doesn’t always take you where you want to go!
Pocket design
How slow can you go?
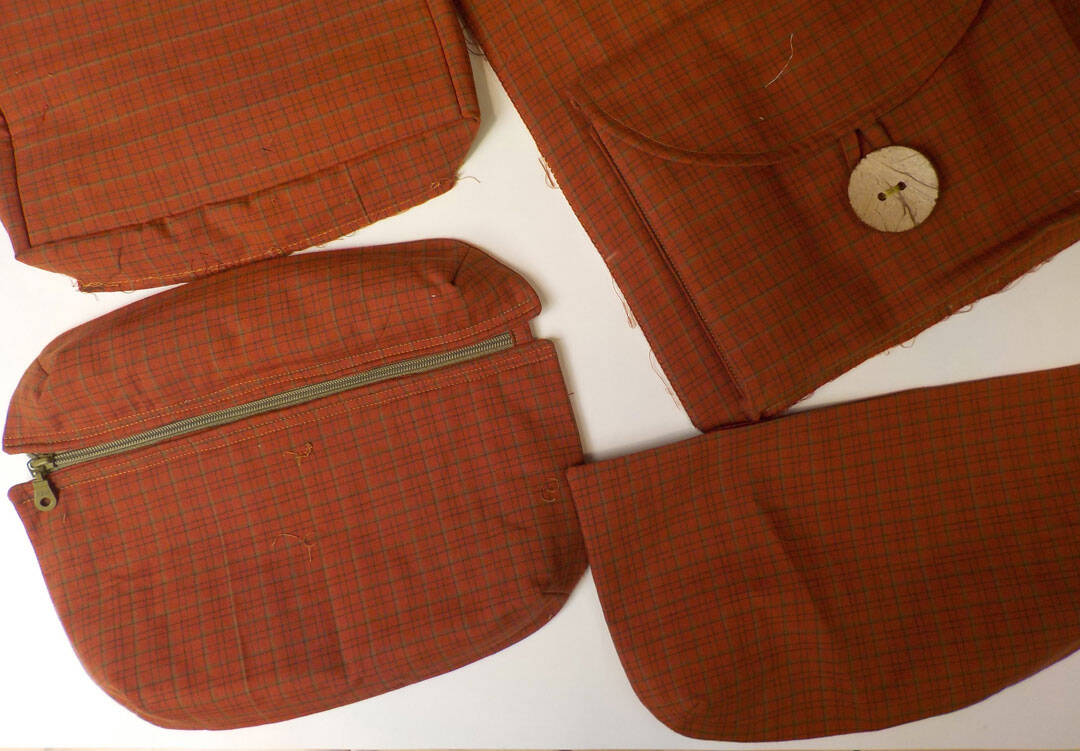
Don’t let me get started on pocket design. The outer pocket planning took me two weeks of design and re-design before I was happy with the result.
You’ll see some of the cast-offs in the photo. Maybe they’ll work for something else eventually but not for your perfect backpack. Good thing I used ancient stash fabric for my pocket experiments because I go through a lot of it!
Zippers
And what about zippers? How many is too many?
Granted, I understand there is a limit to how many you might want to install in one project. Some backpacks can easily have half a dozen zippers but I figured you’d faint if you saw that in your pattern!
The three zippers I have installed are going to be really easy for you to manage. You’ll also learn a little something with each one. I’ve got an inset zipper on one of the pockets. It’s really easy to install and it is part of the largest pocket – big enough for full sheets of paper.
Didn’t you always wanted to be an aficionado?
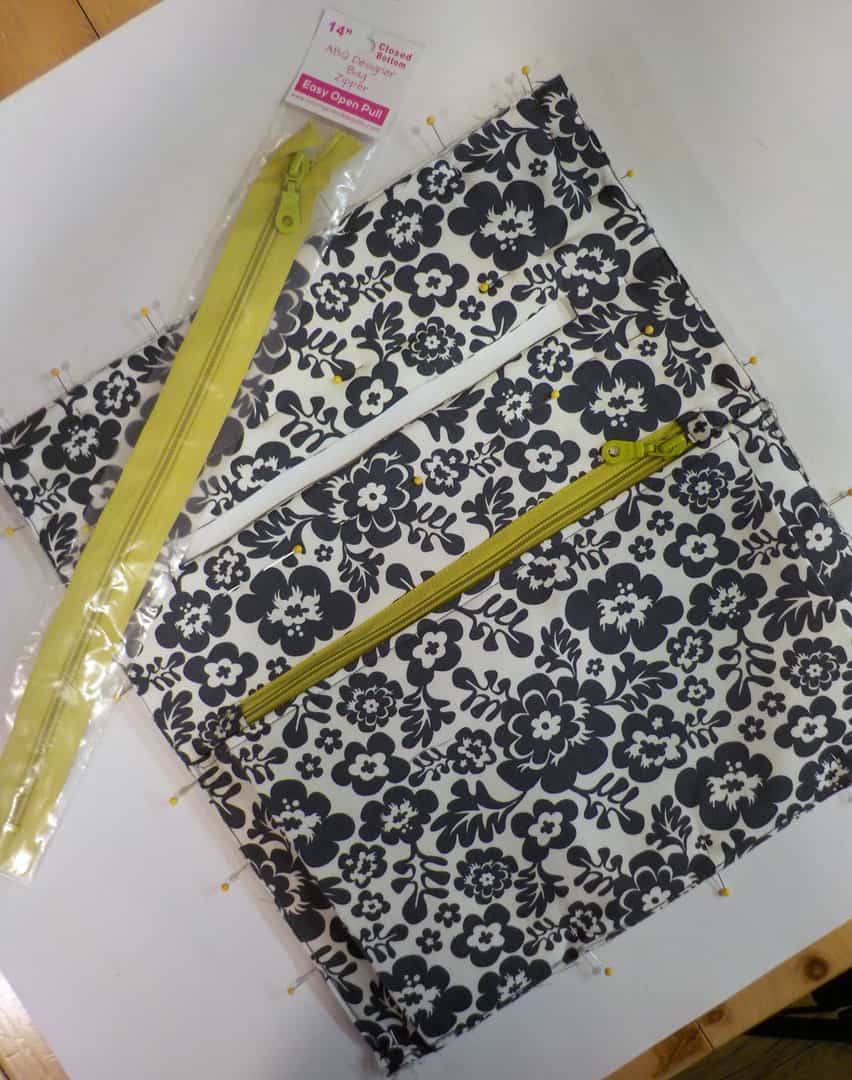
There’s the tabbed zipper in the front accordion pocket. It’s actually fun to install (yes, that’s right – fun) and there’s also a unique hooded main access zipper. I promise you, you’re going to be a zipper aficionado when your backpack is finished!
Try ABQ bag zippers. You’ll want to check out all 3 sizes and 32 colors when you get a chance.
This backpack uses two 14″ and one 30″ bag zippers.
Shoulder Straps
The shoulder straps are also something that take a bit of consideration. Placement is crucial. Nobody wants their armpits shredded by irritating straps! Also, what about the time it takes to make straps?
During a bag class the most time consuming (and boring) thing to make is strapping. That’s why I’m using sturdy 1″ nylon strapping for this backpack. But if you are interested in making your own strapping I’ll do a little video for you on how that’s accomplished.
Picking and choosing the fabric for the sample backpack that will go on the pattern cover
Selecting fabric for a sample bag for the pattern cover is always a bit tense. I had pictured my bag in gray’s, whites and black, with a bold accent colour used for the zippers. At first I thought bright orange, but in the end I chose an apple green zipper that’s a bit on the chartreuse side.
Lining
The lining is the same bold chartreuse colour. It’ll give a bit of excitement when you open your backpack and unzip your pockets.
Outer bag
Instead of the three fabrics I envisioned for the outer bag I picked out two that worked out well together. One, a bold gray and cream floral is by Camelot Fabrics in Canada and the darker fabric is by Robert Kaufman. I don’t usually mix fabric companies in a project but these two fabrics played well together.
Turning it into a backpack pattern that’s easy to follow
Pattern Instructions
Now that I’ve settled on the design and I’ve written my first draft of the pattern instructions it’s time to use those directions to do my first edit.
Obviously, if I can’t follow my own instructions then they need to be rewritten for you! As I work with my new fabric I edit and take pictures of each step.
Crazy busy and time consuming
You can imagine how long it takes to make that second backpack. I’m up and down like a yoyo from the computer to the sewing table, to the sewing machine, to the camera station, then back to the computer. This can go on for days until I have all those pictures and text editing done.
The devil is in the details
From there I edit the photography, make line diagrams, design the necessary templates and then put them into the text. This takes about another week of fiddling around to get right.
Then it’s time to find a model and take pictures of the bag. We’ll have to find a good location indoors at this time of year for a backpack picture. Maybe the local farmer’s market might be good…
The best image then needs to be honed in Photoshop to get it just right for the cover.
That’s followed by another day to work on the layout of the cover and to work out a table for the fabric requirements, notions and other information required.
Finally, the pattern goes to my editor for further fine-tuning.
Whew, I am tired just thinking about it!
Then there’s the video class
Now that I am offering video classes I’ll likely spend the next few weeks filming the directions and preparing handouts for my online students.
If all this sounds just to crazy to contemplate, just remember it’s like any other project where you take one step at a time – until the happy day arrives when it’s all done. I’m thinking mid February for the pattern release.
The finished product
Edited to add: The Daytripper pattern is available for purchase. Find out more about it here.
Do you have a video for this backpack? we are making it but are stuck on where the bias tape goes?