Sewing foot with a leveling button and other fixes for sewing heavy fabric
Editor’s note: This is the second in a series of posts that will make up a guide to sewing machine feet. See them all here.
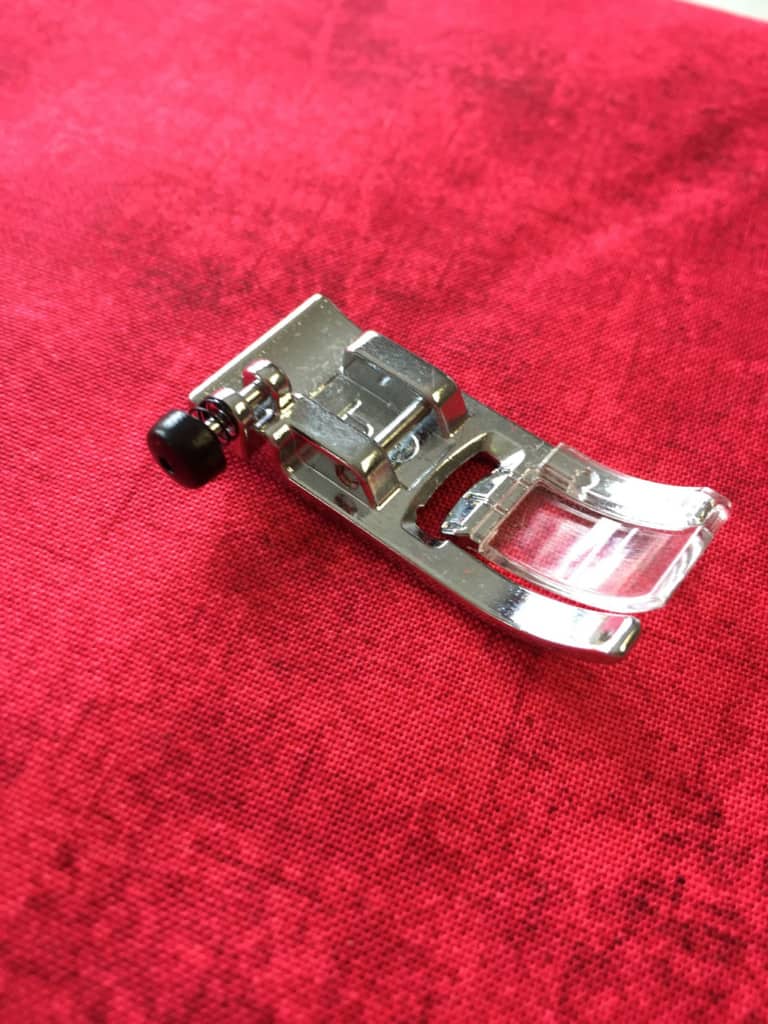
If you like to sew bags or hem jeans or work with heavy fabrics you’ve likely discovered that sewing machines just don’t like to sew uphill!
As you approach the ‘crest’ of the hill your stitches will get smaller and smaller. If you are able to force your machine up the incline making teeny tiny stitches, you’ll find that coming downhill, your stitches will get overly long and you might even see some skipped stitches.
All this can be avoided by proper use of one of the most underused and misunderstood feet – the one with the little black leveling button. Practically every machine comes with one nowadays.
It’s part of the basic zigzag foot – the ‘J’ Foot with our own stock of Baby Lock sewing machines sold at the ABQ Sewing Studio.
How to sew over seams with heavy fabric
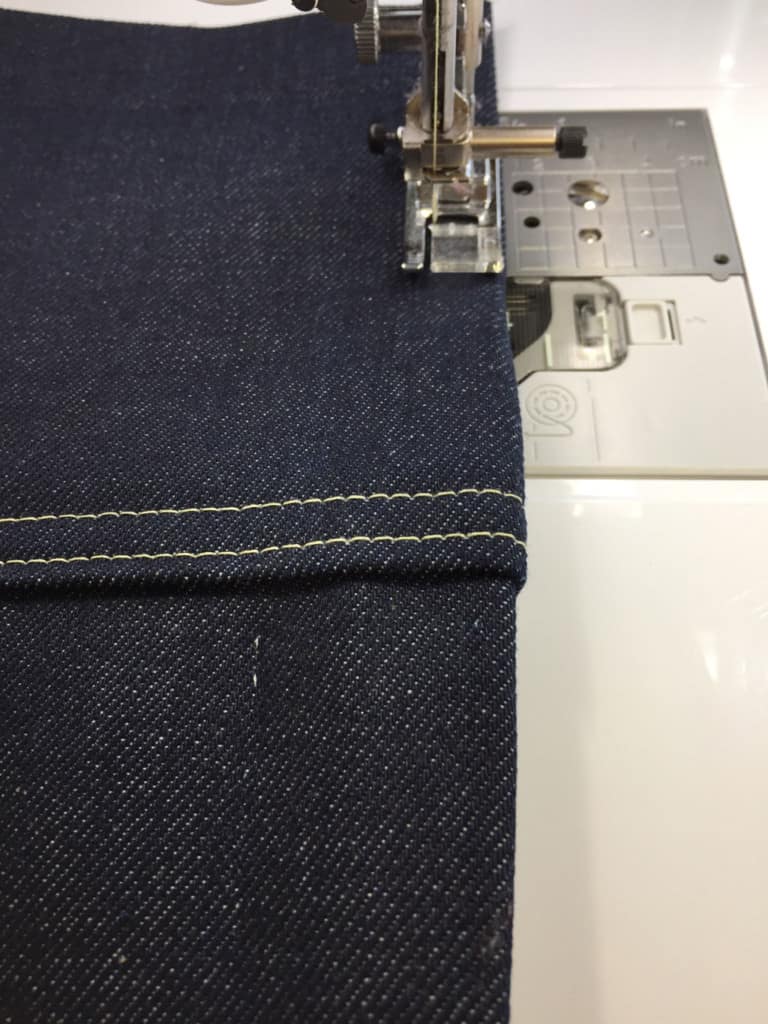
In my example I am hemming heavy jeans fabric.
Sew to the “hill” then use the leveling button
I sew up to the point where the ‘hill’ starts indicated by my yellow-headed pin. The needle is down in the fabric.
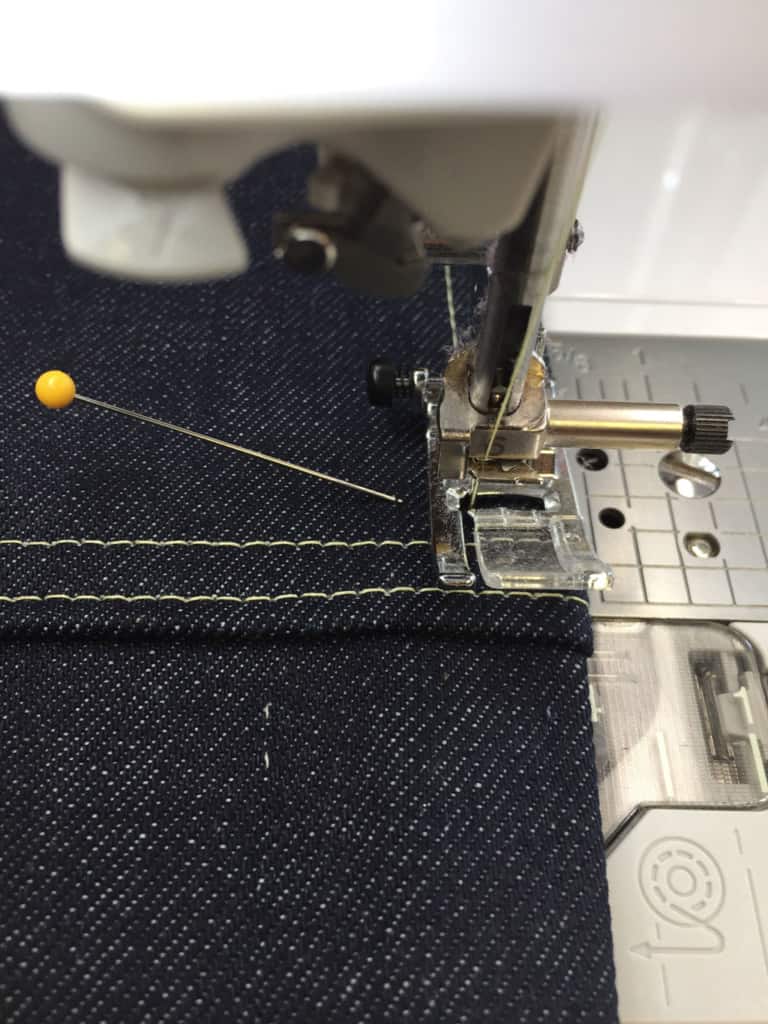
Raise the presser foot. Notice that the foot tips front to back. While holding it level, push in that magic black button.
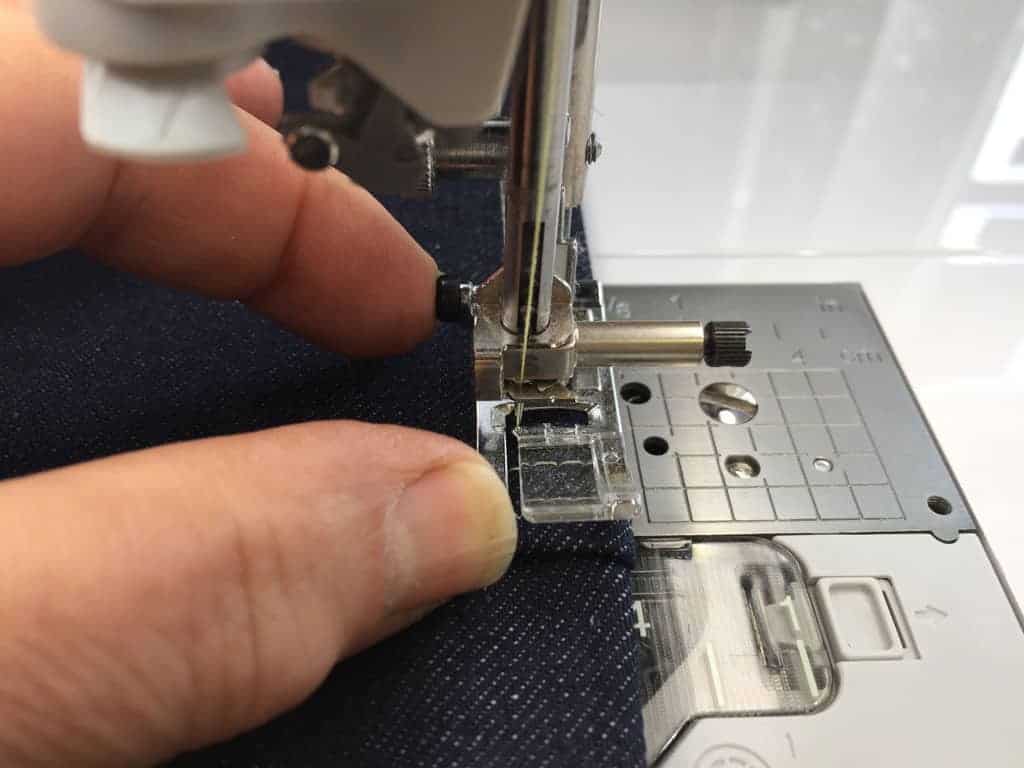
Lower the foot while pressing in the button. If you don’t it’s likely going to pop out again. Once the foot is lowered it is locked, it cannot tip backwards. You have fooled that foot into thinking it’s sewing a flat piece of fabric. Release your finger from the black button and stitch slowly over the lump.
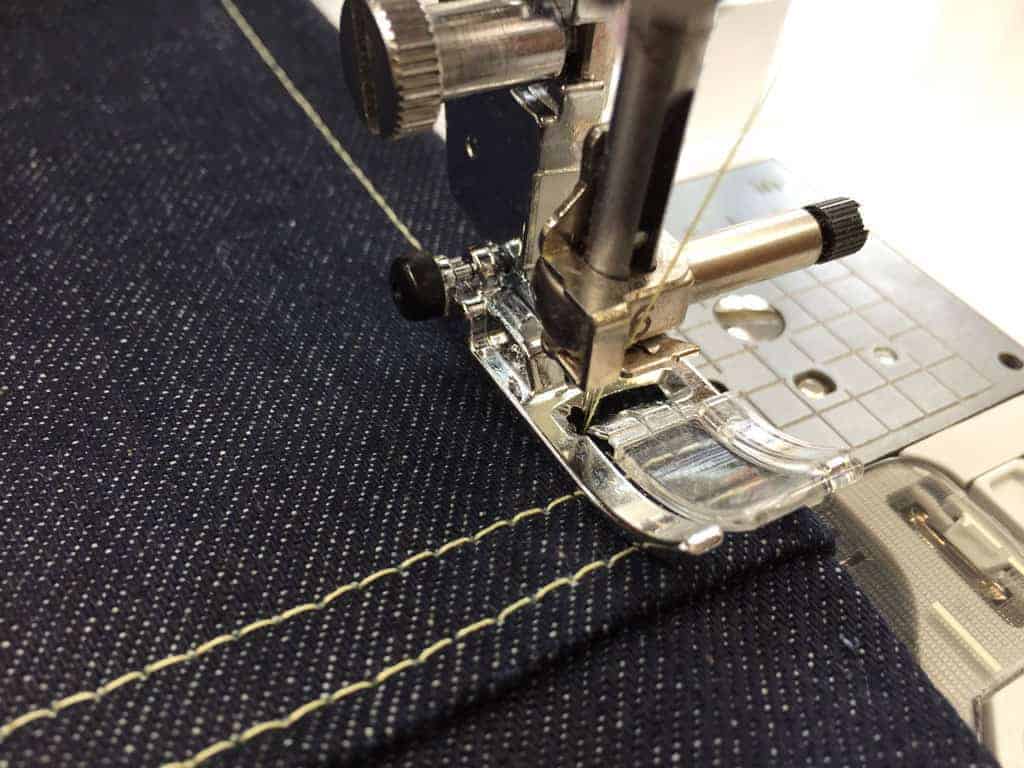
The downward descent
On your way downhill the button will pop back out again into its normal position. Finish your seam.
Another use for a foot with a leveling button
It’s also a great idea to use this foot when starting to sew a seam that’s bulky to avoid getting stalled or creating a bird’s nest of thread under the fabric. Give it a try!
What to do if you don’t have a leveling button 🙁
If your machine is lacking this innovative button you might try what amounts to using a splint to hold up the back of your sewing foot.
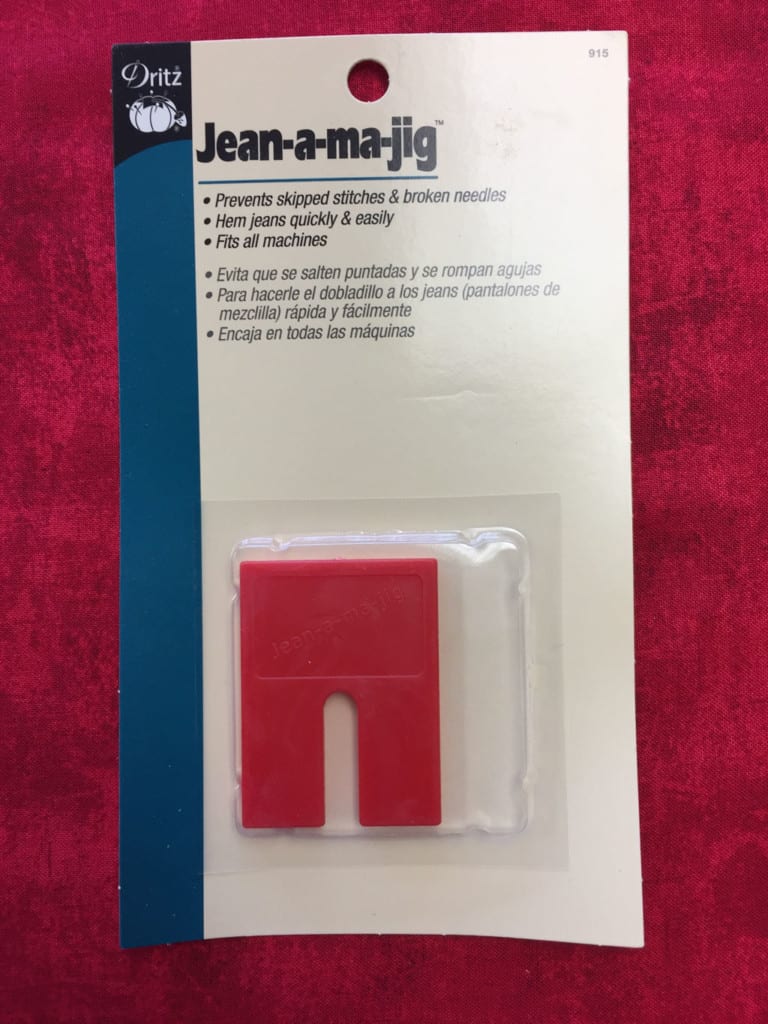
I sell the Jean-a-ma-jig online at shop.amongbrendasquilts.com for just this purpose. There is also a similar product called the Hump Jumper.
The sewing process is similar. Sew up to where the bulk begins. Stop with your needle down. Lift the presser foot and slide the unit under the back of the foot butting it all the way up to the ‘hill’.
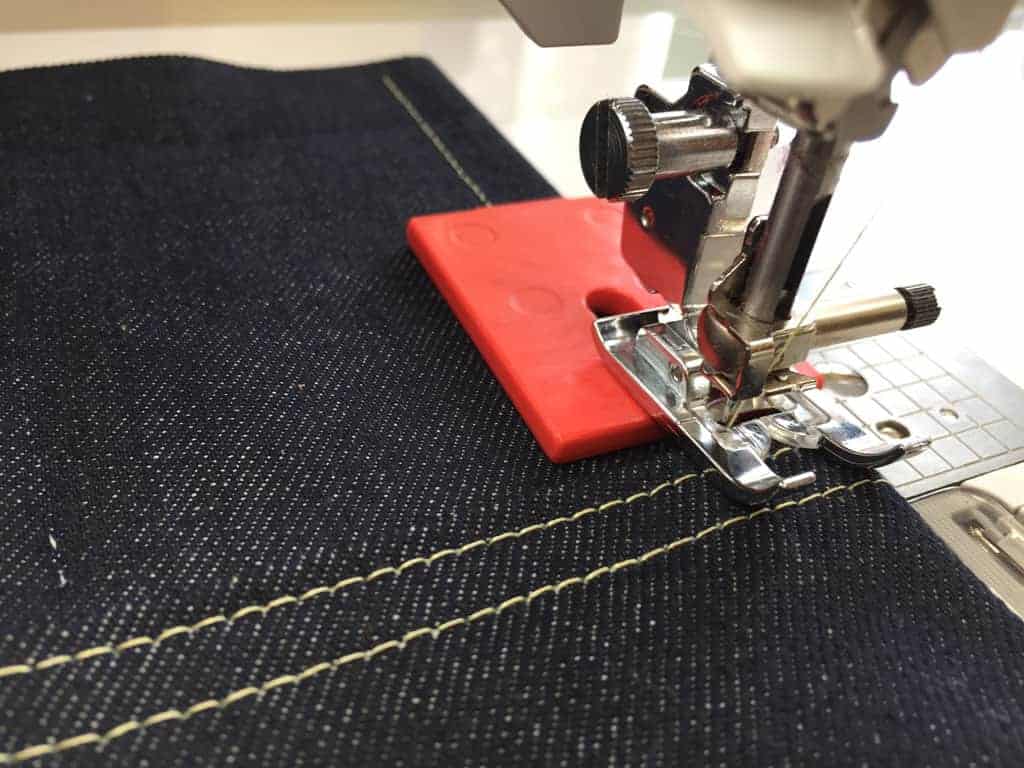
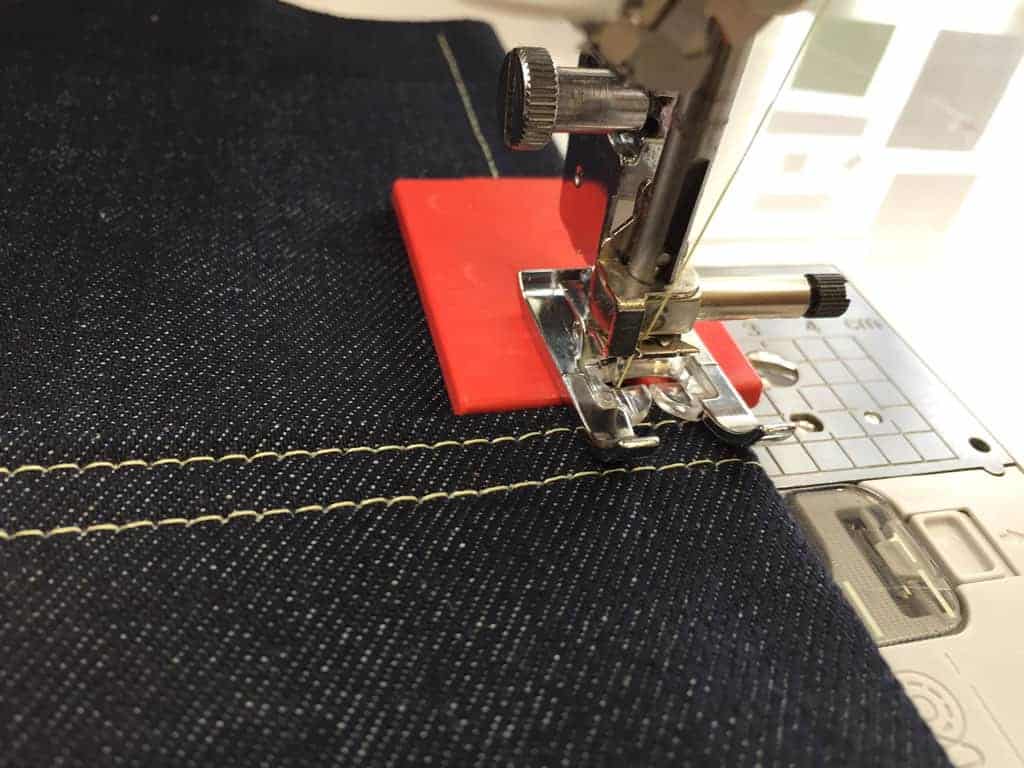
Sew across the hill. I like to keep a finger behind the Jean-a-ma-jig because it is apt to fly off the back of the machine and hit somebody as it passes the end of the sewing machine foot.
Seam examples for each method
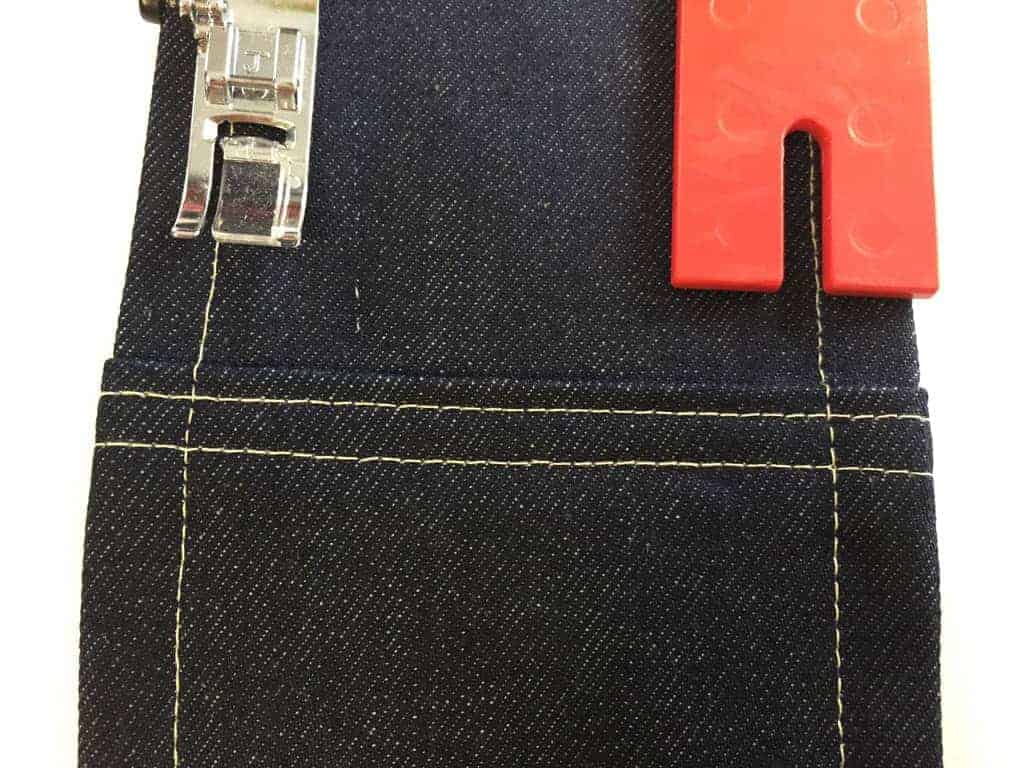
Here are both examples stitched out. Both worked out fine, no skipped stitches and the stitches are even in length.
Now that you are in the know, there’s no need to force your sewing machine over bulky seams. We see a lot of costly repairs come to us with issues stemming from this.
Both the foot and the tool are easy to use once you get the hang of it. I hope you get a chance to try out your leveling button soon!
Like this article? Join our newsletter for more
We regularly publish helpful sewing tips and information related to sewing, quilting, and bagmaking. When you subscribe, you also get a list of 12 handy tips that will help you create a bag that’s perfect for you.
Thank you for this article on the j foot. I have one, it came with my Babylock machine. It was very helpful.
I’m glad it helped Wyn. I myself wasn’t aware of what the little button was for for years! LOL
I knew what the button was for but didn’t know how to use it. Thank you for the explanation!
Pat
My pleasure Pat!
Who knew! LOL! After viewing this tutorial I immediately grabbed my A foot with the “black button”, threw it on my machine and tried it. Amazing. Linda
Glad to hear it Linda!